Wednesday 29 December 2010

Music Video Planning - Props

I've put together a quick table to list all the necessary props we'll need in the video. Thankfully, almost all of these are things that will be able to be found around the house or easily got hold of - the only things that will need to be bought are the chocolate for the car scene and, possibly, the rope. I have luckily found someone who will possibly be able to supply me with some free of charge, but this isn't yet confirmed.


I've also finalised how the rope will be safely constructed:


The neck and main rope will be separated, and the length of rope below the apparent knot will be tucked into the back of the actor's clothing.

Tuesday 28 December 2010

Music Video Planning - Main Character Costume Design

At the beginning of the month, Beth and I finalised what attributes we wanted in the costume of the lead in our video. I've compiled these into notes on Excel so that we can refer back to them easily. As the short-list of possible actors for the main role all have folk-like/vintage styles, it keeps any costs down, as they will be able to use their own clothes, providing they are aware of our costume plan:

Photobucket


As we noted down the ideas, I also sketched them out so we could more easily visualise them. I've since inked over the sketch and coloured it roughly on Photoshop to get a better understanding of the colours we want and how it will look in reality:

Photobucket

Friday 17 December 2010

Print Production - Final Advert

As most adverts carry over a theme from the album cover, I did the same here. I used the same image as the digipak front cover for the bottom half of the picture. This time I completely edited out the bush on the left hand side, painting over it with a blue picked from the background using the colour-dropper tool. I also extended the tree trunk, painting it in. I added extra branches to the top by selecting sections from the original, uncropped photo.

I kept the font themes the same, and ordered it in a similar way to the album cover - I even kept to the idea of words growing from the tree, this time using it for the "Out Now" text. To keep with the almost illustrated appearance of the picture, I drew in the review stars myself, so they looked less regular.

I displayed relevant addresses and logos on a small dark bar across the bottom so that the information can be seen clearly without interference from the dark branches in the picture.


Photobucket

Digipak Advert

Thursday 16 December 2010

Print Production - Final Digipak - Full Digipak

To get a better understanding of how the pages fit together, I've joined the outer pages together, and the inner pages together, as well as compiling them all into a single digipak template:


Photobucket


Front Cover Spread


FINAL Inside Spread

Inside Cover Spread


FINAL Layout

Full Digipak

Wednesday 15 December 2010

Print Production - Final Digipak - CD

Wanting to get a complete idea of what this digipak would look like, I also designed the CD cover. I wanted the CD and the cover behind to correspond and so used the same image on the CD. Now, if the CD was to be put back in, its design would merge with the image behind it, and appear as if there was still only one image.

As with the left inside cover, I wanted to continue the font themes, using fonts in the same way I had for the front cover, writing "This" in the font "Loved by the King", and "YOUNG BOY" in uppercase "High Fiber". I arranged them in the same way I had on the cover, and placed David Gibb's name below, appearing the same as it had on the cover. I even continued the cover's blue theme by using a light blue border around the disk, colour-picked from the cover image.

I also included the relevant symbols from the back cover - the compact disc and DVD logos, and, looking at other disclaimers from the CDs in my house, wrote another disclaimer and fake numbers on the bottom to make it look authentic.

FINAL CD

CD Cover

Tuesday 14 December 2010

The Animatic

Having storyboarded almost all of our video, splitting the scenes between us, we chose to photograph the first half and put it onto the computer so we could turn it into an animatic.

Using Adobe Premier Pro, we imported all the pictures and, cutting and ordering them, matched them with the audio, adding movement with the "scale" and "position" animation options in order to create camera zooms and pans we imagine would appear in our final video.


Tempo and Editing

Analysing the first 50 seconds of the music video of "Fall for You" by Secondhand Serenade, it's clear that song tempo has had an impact on the shot lengths and amount of shots - within the 50 seconds that contained the first verse and chorus, there were only 20 shots, lingering and long in length to suit the slow, quiet nature of the song's opening. On average, this meant that it would have had about 24 shots a minute - a shot every 2.5 seconds, if it continued in the same style.


The first 50 seconds of a far more upbeat video, in this case Elliot Minor's "Still Figuring Out", differs greatly to "Fall For You" in amount of shots - this time approximately 52 shots for the same amount of time, on average meaning the shots would each be slightly less than a second in length.


It clear from both that as the songs both establish themselves, pick up in mood, and end, the shot lengths vary - the establishing shots of each video have more time taken over them in order to introduce the main singers/scenes. As more instruments are brought in and the mood is fully established, the editing speed again picks up - in the first video to signify conflict as it moves into its second verse and guitars are introduced, and in the second to mirror the increased musical texture as the song moves into the chorus.

Whilst at the moment, the animatic for our own music video only briefly sketches out possible shots and shot lengths, this quick research helps me understand further where we ought to take time in our video, and where we can afford to speed up. For example, the establishing shots and, indeed, the first scene of our video will have a slow editing pace before the music starts, allowing the viewer alongside the character to take in the surroundings - a key feature of folk videos. However, as the vocals kick in and the scene changes and moves towards the chorus, the speed can get faster as more plot devices are introduced. To prevent there being a full-blown dramatic plot, however, this will be broken up with the overriding home-video from the car journey, introduced quickly and flickeringly at first, before brought in fully, as if being overwrote on a home video camera (as during my research on this website, it was suggested that an editor should "split the story, and scatter the plots throughout the video"). Where the music breaks down into the bridge, again the pace will slow, and I imagine that the shots will also slow considerably as the end of the song and video is revealed.

Print Production - Final Digipak - Inside Right Cover

For the right cover, I've used the other of my favourite photos from the shoot:


However, at present it was too dark to use, as I wanted to put some text on this one, informing the consumer of the presence of special features that could be accessed through putting the CD into the computer. To do this, I upped the brightness and contrast, then concentrated on continuing to increase the "brightness" and "lightness" options from the "Brightness and Contrast" and "Hue and Saturation" options respectively. However, after a while it wouldn't go up any more, so I had to overlay the image with a white layer on a low opacity instead. I made sure I was aware of where the CD would be placed by drawing out a rough template.

I made the outlined text in Illustrator, where I could manipulate the pt. size of the lines surrounding the coloured font. I outlined the font with dark grey so that it could stand out against the background - I was still having problems with contrast between the font and the background, so this helped a lot.


FINAL Inside Right

Inside Right Cover

Monday 13 December 2010

Print Production - Final Digipak - Front Cover

I posted the draft of my final front cover spread on my Facebook page, and gathered a few comments about things I could improve on:


Having both reviewed the comments and looking again over the design myself, I edited it slightly - cropping it to make it more square, shifting the disclaimer text along so that it now overlays a paler part of the photo where it will be easier to read.


Photobucket

Front Covers

Print Production - Final Digipak - Left Inside Cover

Wanting to continue the tree designs from the cover, I chose my favourite skywards photos from the recent shoot in order to fill the inside covers. I did try to use the shoe-tree photos, but I felt that the colours and the style didn't fit what I had done with the front cover.

For my left inside cover, I edited this photo:


In Photoshop, I rotated them image then raised the brightness and contrast in order to produce a paler background, and put it into greyscale. I then cropped the right side down so it was roughly the right shape for the digipak template and, in order to create a split between the top and bottom halves of the photo, I painted over some of the branches. This allowed me then to use the lasso tool to select the top half of the photo and move it up the canvas, then separately select the bottom half of the photo and move it to the bottom of the canvas. This had given me a large central space for me to insert lyrics, or any sort of text.

I wanted my text to be more understated than the front cover, but still to have the same theme. I used the same font as I used for "This" on the front cover - "Loved by the King". The other font I'd used on the cover, "High Fiber", was too straight and regular for the scrawled appearance I wanted. I coloured it grey instead of black so it had a much gentler appearance. I put branches onto the words in the same manner I did before - selecting parts of the photo, layering it via copy, then aligning it against the text. This time, I also selected the branches with the magic wand tool and filled them grey to match the font. I didn't put them on every letter this time - I had tried, and found that it became too complicated and messy-looking. I chose to write a quote from the title song, "This Young Boy", and not the full lyrics. I had tried, but I disliked the amount of text and, as I was trying to keep a relatively minimal approach, felt that one quote was enough.

I wanted this and the other of the inside covers to keep to a greyscale theme, and generally be slightly darker in mood, reflecting the contrast of brightness and darkness I hope we'll portray in our music video.


FINAL Inside Left

Inside Left Cover

Sunday 5 December 2010

Print Production - Cover Development

Having been able to go back out and gather photos in the woods, I'm now able to design the outer cover of my digipak.


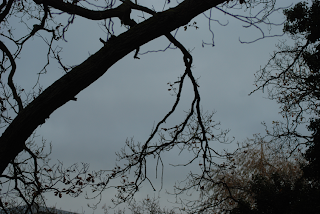
I knew that for both the front and the back of my digipak I wanted a single, unbroken image that continued across both pages, and wanted a trailing branch to link both sides together. Returning to college after the location shoot, I encountered this branch which, with some flipping and rotation on Photoshop, was perfect for this purpose.

In editing, I cropped it down to a practical size with roughly the dimensions of a final outer cover and, using the brightness and contrast options, made the image much brighter and clearer and contrasting the branches as an almost silhouetted black, also using the hue and saturation options to make the sky appear a much stronger blue. I found I had to erase some of the branches, though, to allow enough room for the title and other text - this was quite difficult, as I had to paint over it, using to colour-dropper tool to ensure that the colour I was painting with matched the sky. I also had to use smudge and blur tools to then disguise the boundary between the paint and the photo.

I had initially intended to simply overlay the photograph with my title text, using the fonts "Loved by the King" and "High Fibre" which I favoured in my initial experimentation. However, as the branch was such a dominant feature and took up so much space, I found it hard to position it in a way that didn't mean that the words were obstructed. Instead, I decided to incorporate the words into the branch. Erasing more smaller branches to make room, I lined up the text with the branch and, where the letters did not touch the tree, I painted in new branches to make it appear that they were growing out of it. I even selected other branches from the image and, copying them to a new layer, dragged them onto the letters, flipping and resizing them so they could not be located easily elsewhere on the image.


To allow myself more clear space for next on the back cover, I erased another patch of small branches, and initially aligned my track list to the right, typing them all in lower case in a grey colour, so they didn't have the same dominance as the title, and also in order to match the style in which I presented David Gibb's name - also lower case and grey. However, after experimenting with positioning, I found I favoured a central alignment more, seeing as the title on the front cover was centrally aligned too. However, the presence of bushes and branches made making the text readable extremely difficult. I eventually chose to use a circular gradient to put in a fuzzy white background on a lower layer, keeping its opacity low so it didn't completely blot out the background.


Finally I added things to the cover in order to make it appear more authentic. I found a barcode, and, looking on the backs of my own CD's, found disclaimers that I copied out, giving it an official appearance. I included the "compact disc" logo, as well as the "DVD" symbol, as inside I want to refer to some DVD bonus features on the disc - "making of" or "behind the scenes" clips.

Completed Cover Design - First Draft


I've posted this image onto my Facebook now, in order to get feedback from others so that I can improve it. Having posted it, I've noticed that the sides are a little too wide, so this is something I'll need to revise.

Friday 3 December 2010

Developing Technology Skills - Conclusion

This week, I met my targets for learning new technologies. At the beginning of the week, me and my partner took out one of the new cameras, intending to learn more about them. During our mini-shoot, we took the shots we needed to create some splitscreen shots, and also began to experiment with the manual focus.

We imported the videos into Premier Pro, and began experimenting first together, then independently with putting together the necessary parts of the videos to pull it together into splitscreen. At first, we found this difficult, as we weren't sure where to begin, and so did some research for tutorials on Youtube, coming up with this video:


It was easy to understand and, having dragged the "crop" option onto our videos, began with splitscreen. We found immediately that we hadn't made the camera still enough, as it must not have been properly anchored to its tripod. Due to this, there is a slight camera shake that causes the splitscreen to move slightly and reveal the technique. However, I have after this discovered the "anchor" tool, where I can anchor two videos together, and so hopefully in future, if there is a camera shake, the anchored videos will move together and not ruin the shot.

We also began editing the experimental focus shots we took, filling in my second target - I found options for tinting, brightness and contrast which I used on my focus experiment shots, making the colours more contrasting, and brightening them, as they were a little dark before. I also stumbled across other techniques which, though I didn't use, would be useful in our final music video - lens flares, gradients and similar effects. I also re-learned how to use key frames for gradual fading/increasing of effects (e.g. the increase of brightness at the end of my video below, and the fading of the music). I also found the option for video noise and ageing effects on Premier, meeting my final target without having to explore After Effects.

Having edited each shot how I wanted, I compiled it into a short video to note my progress:


I can now use this as a benchmark for future experimentation, and as something to refer back to if I need it.

Thursday 2 December 2010

Further Photography

Inspired by the work in the woods, I returned home and took some more skywards photos in the small wooded area that divides my street from the main road:


Whilst providing me with material I could possibly use for my print production, this has also allowed me to consider more scenic shots that we could use in our music video.

Print Production & Location Shots

This week Beth and me went back out into Nunnery Wood in order that we might both gather some location shots. I also took this opportunity to gather some photos for my print production work. During this, we found a perfect location for the part of our video where the boy enters a clearing and is surrounded by the dead people which I photographed to refer back to later:


I also pursued my idea of the shoe tree for my print production work, borrowing Beth's brogues due to their vintage style and hanging them from various places.


I had initially wanted the above image as the cover of my digipak, but now, considering the dark background which would make finding a contrasting font style and colour hard, I think I will probably use this as an inside cover picture, using blur filters to make the image more indistinct, perhaps, in the same way that Muse's photos for "The Resistance" are.

As I left the woods, I tried taking a skywards shot, in the same style of the video shots in Bon Iver's "The Wolves", coming out with this:


It's dark at the moment, and needs some editing, but I think this might work well.